

Submission workflow
Github repository
This step will only need to be done once - at the beginning of the semester. The course docker container uses uv and has been tested in an Ubuntu GPU-based environment. Find the repository for your course on the Starter repos page, then use Github import to make it your own.
Make sure you know how to commit and push your changes to your repo in the branch called main. If you do not push the latest changes the grader will grade an outdated version of your code.
Add TAs as collaborators
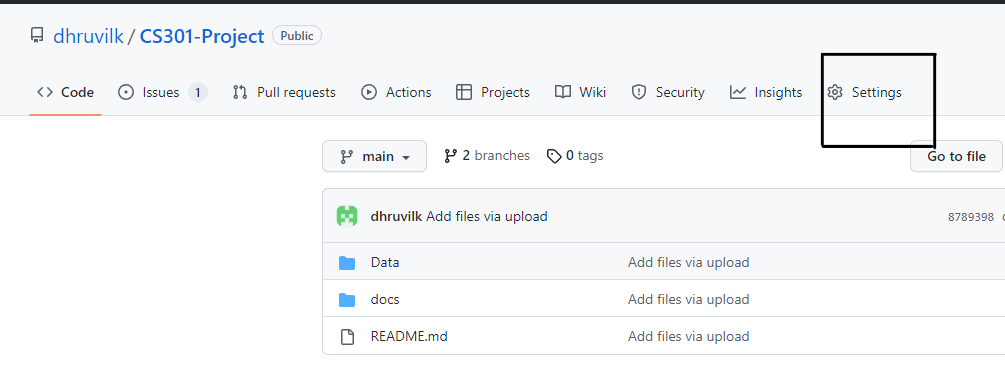
This step will only need to be done once - at the beginning of the semester.- Go to the settings tab of your repository
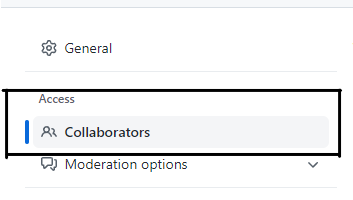
- On the left, find the tab titled “Collaborators”
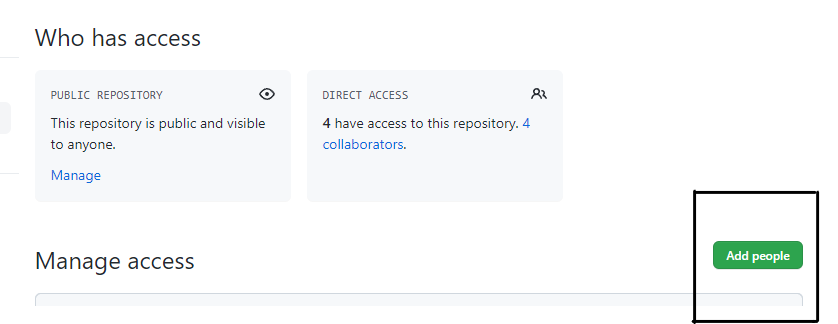
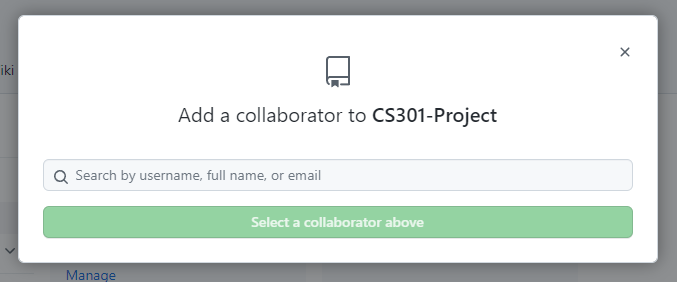
- Click on “Add people” and enter the GitHub id or email address of the TAs Github IDs.
Create assignment folder
In your repository, create a folder for each assignment underassignments/. The first one is assignments/assignment-1, the second assignments/assignment-2, and so on. Each assignment folder needs a README.md file containing:
- Name of the assignment
- Date of submission
- Instructions on how to run the code
- Instructions on how to run any tests (if applicable)
- Instructions on how to run any notebook (if applicable)
Doing the work
If you have authored a notebook, using Colab or other cloud computational environments, the notebook can only be submitted as part of your Github repository and not as a separate file. Please do not share the notebook with your TA using theShare button.
In all cases, either local development or cloud development of notebooks: ensure that all cell outputs are saved before pushing the notebook to your github repo.
It is particularly important to avoid changing and pushing to Github the assignment after your assignment deadline and until you receive a grade. If you do so, your TAs will flag the assignment as late or worse you may be flagged as attempting to cheat. If you want to make changes you can do so in a local branch and then you can merge with main.
Found an error on this page? Report an issue.